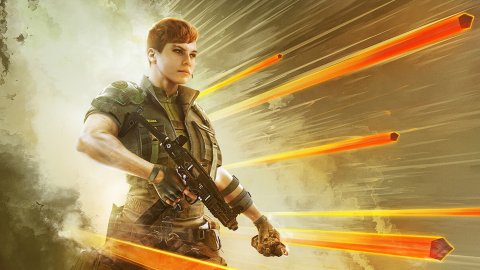
Rainbow Six Siege - Thorn: loadouts and tips for using the High Caliber operator

Rainbow Six Siege - Thorn
In this Rainbow Six Siege guide - Operation High Caliber we will explain everything you need to know about Thorn, with some useful tips on the loadout to use and how to make the most of the peculiarities of this operator.L Operation High Caliber brought with it various new features for Rainbow Six Siege, including the Outback map rework and various fixes. However, the main course this season is undoubtedly Operator Thorn, a defender who uses the Razorbloom Charge gadget, a proximity grenade with automatic trigger, to surprise and put the opponents under pressure. He is a versatile character, not particularly difficult to use, but who requires a certain skill and experience of game dynamics and maps to fully exploit their potential.
Weapons, gadgets and the Razorbloom Charge
Thorn, Operation High Caliber's new Rainbow Six Siege operator Brianna "Thorn" Skenah is a defender with average armor and speed. Before analyzing in detail the characteristics, here is its equipment in Rainbow Six Siege:Primary weapon
UZK50GI - SMG M870 - Shotgun
Secondary weapon
1911 Tacops - C75 Auto Pistol - Submachine Gun
Gadgets
Barbed Wire Mobile Shield
Unique Skill: Razorbloom Charge
Thorn can use the UZK50GI, the new SMG introduced with Rainbow Six Siege's Operation High Caliber. It is a weapon that fires .50 caliber bullets and is characterized by a not particularly high rate of fire (700 RPM) and a rather low magazine (22 + 1), all offset by very high damage (44 damage points per bullet). This SMG is also useful for opening holes in destructible walls, a good way to create lines of fire for the team, but also unsuspected hiding places for the Razorbloom Charge, as we will see later. Thorn can also use the Shotgun M870, an undoubtedly valid weapon, but the recommended choice falls on the new SMG, possibly with the Flame Arrestor accessories (to reduce vertical recoil) and the angled handle. For secondary weapons we find the 1911 Tacops and the C75 Automatica. The former offers greater accuracy, while the latter is a little more difficult to manage due to the high recoil, compensated by the rate of fire.
Among Thorn's gadgets we find the barbed wire and the movable shield . Both are valid and the choice should fall on what could suit the team. As we will see later, barbed wire has excellent synergy with Thorn's Razorbloom Charge, but even the mobile shield with a little cunning could be valid in this regard.
And finally we come to the unique ability by Thorn who for obvious reasons defines the style of play, namely the Razorbloom Charge, a proximity grenade with automatic remote trigger, useful for killing opponents, making them waste time or making them make a mistake.
Thorn can place up to three Razorbloom charges. It launches as if it were a grenade and adheres to any surface it comes into contact with, be it a floor, a wall or any object in the scenario. Once positioned, it takes about five seconds to activate. The Razorbloom Charge detonates after detecting an enemy within its ten-foot radius, ejecting a series of sharp blades in all directions that cause massive, often fatal damage to the unfortunate player.
Before exploding the grenade turns red and emits a recognizable metallic sound. About two seconds pass between the trigger and the actual explosion, a small window of time, but for the more experienced players more than enough to react and get out of its range or destroy it. The Razorbloom Charge, in fact, is extremely fragile and can be deactivated with any gunshot or melee attack.
To make the most of this gadget, therefore, it is essential to play cunning and position it in tactical points, in practice hiding it from the view of the opponents to make it even more insidious and lethal. So use your imagination and knowledge of the map by placing the Razorbloom Charge in blind spots or behind objects, such as a ceiling beam for example. You can also open a hole in the destructible walls with the UZK50GI and place it inside, thus creating a very treacherous trap. However keep in mind that the Razorbloom Charge is not a real explosion, but rather blades that are fired with great force in all directions, so you need a clean line of fire, free from any obstacle, to hit an opponent. .
Thorn's device has excellent synergy with various secondary gadgets, including those supplied to the operator. For example, placing a Razorbloom Charge near the barbed wire will make it more difficult for opponents to escape, as it slows down their movements. Or you can leave it behind a movable shield fixed at the entrance of a room, thus taking by surprise the unsuspecting opponents who will bypass it. In general, any gadget that slows opponents or blocks them in specific animations has good synergy with Thorn's grenade.
The Razorbloom Charge, of course, is not triggered by teammates if they enter its range. action, however, suffer damage from the explosions. And the same goes for Thorn. The device can also destroy allied gadgets, so consider very carefully where you place it and if possible communicate it to your companions. Thorn can retrieve a previously placed Razorbloom Charge at any time, even when it is about to explode, which may come in handy at certain times.
Thorn's Razorbloom Charge is a very versatile and deadly gadget in the right hands. but it has natural counters in Rainbow Six Siege. For example, Thatcher's EMP grenades disable her for 15 seconds and Zero can destroy her with the Argus Launcher. Similarly, Twitch's drone can also take Razorbloom offside, while IQ can spot them and report them to teammates with its Electronic Detector. Additionally, shield-wielding operators, such as Montagne, can survive the impact of grenade blades, albeit taking a large amount of damage.
Have you noticed any errors?